If you are looking to send us a print-ready file for your artwork submission and the files are under 10 MB, you can send it by email to sumit.jain@applecapitalpm.com. For files that are over 10 MB please use a service such as WeTransfer.
If possible, please send your file as a print-ready PDF. We also accept file formats such as EPS, PSD, JPEG, TIFF, Microsoft Word, Microsoft Excel, Microsoft PowerPoint, Illustrator AI, InDesign INDD and more. If you are unsure whether we can work with other file formats, just get in touch with the details of your file and we’ll see if there’s a solution to print from your file(s).
If you are sending EPS, PSD, INDD or AI files, please make sure archive them in a ZIP file as it lessens the likelihood of corruption when sending the file(s) by email or through our upload form. Archiving your files into a ZIP file is also recommended if you are looking to send over a large quantity of files (ie, 5+ files).
When setting up your final PDF to send over, use the following as a file checklist before submitting your PDF file(s):
In some cases you may need to have the fonts used in the PDF handy to provide us should font rendering errors occur. This occurs rarely however.
When sending over InDesign, Illustrator or Photoshop PSD files, please make sure to include the fonts used in these files. With InDesign and Illustrator, you will also likely need to include the linked image files used in the document as in most cases they are not embedded within the actual file but externally referenced. You will also need to package up the fonts used in the design.
With Photoshop PSD files sending fonts in most cases is not necessary unless further edits are requested to be done by our Design Studio, in which case sending the fonts used in the PSD would be required.
If you are sending an InDesign file, you will need to use the Package function within the program to collect the layout file, fonts and external images within one folder. This is done by selecting File » Package from the main menu. Once collected, archive the resulting folder in a ZIP file and send that over. More information on InDesign’s Package function can be found here.
All of our die-cut labels are printed and cut to shape in-house using a modern digital printer that handles both cutting and printing. When setting up your artwork to have labels printed, please note that our printer prefers the following format and file setup specifications:
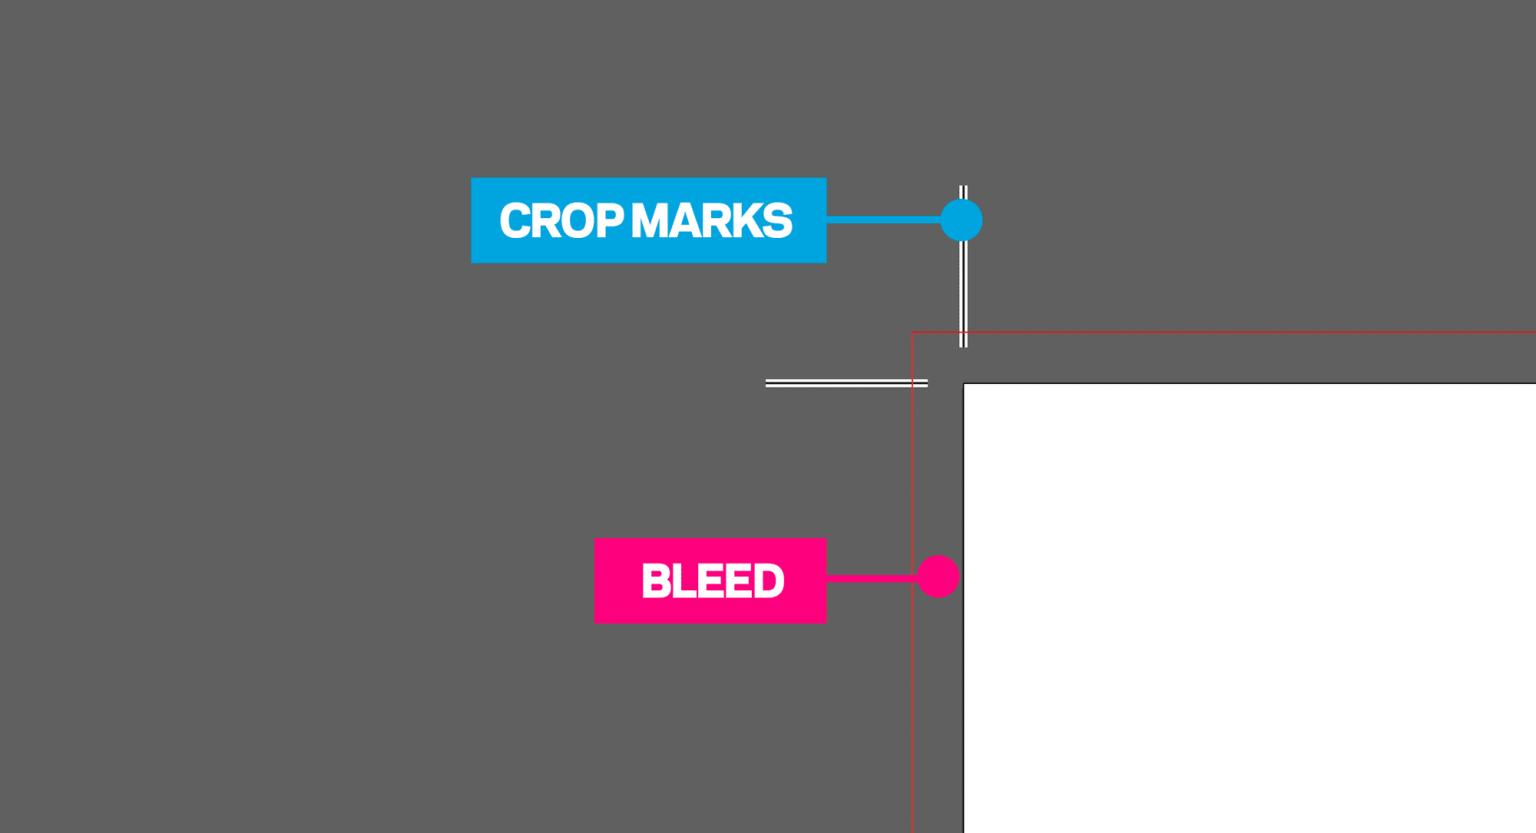
With artwork where any images, text or background colours/textures go right to the edge of the page, you will need to provide crop marks and bleed on your artwork files. You can easily add these within most Adobe design programs. If you are creating your artwork in a Microsoft program, this function will not be available. We can set up crops and bleeds on most artwork created in Microsoft for a small fee.
Crop marks are the little lines that sit around the edge of the document showing where the area of bleed ends and the proper document area begins, they work alongside bleed to tell the print worker where the paper needs trimming. Crop marks are usually hairline or 0.25pt in thickness and are set in Registration Black.
This is the area of artwork that is extended beyond the actual dimensions of the document. It is used to avoid strips of white paper showing on the edges of your print should the batch be misaligned when cut to size. Any objects in your artwork that touch the edges of the document require bleed, for instance a background colour or image should spread to cover the entire bleed area as should any objects that creep in from the side of the page. The standard amount of bleed in the UK is 3mm beyond the edges of the final document size.


© 2024 Apple Capital Print Management
Unit 59, Spaces Business Centre, Ingate Place
London SW8 3NS
london@applecapitalpm.com
0207 627 2189